


Back
As the leaves begin to change and the air turns crisp, it's time to welcome fall into our homes. This season is all about creating cozy spaces, indulging in delicious seasonal recipes, and preparing your home for the cooler months. Here’s your guide to making the most of autumn, from festive decorations to Thanksgiving meal ideas and essential home prep tips.
One of the best parts of fall is decorating with rich colors, natural elements, and cozy accents that bring warmth into your home. Here are a few easy and stylish ways to bring the season indoors:
Outdoor Decor: Greet guests with a fall-themed front porch. Add pumpkins, mums, and wreaths with autumnal colors. A few hay bales or rustic lanterns complete the look and make your home feel inviting.
Living Room Accents: Update your living room with soft throw blankets, warm-toned pillows, and textured fabrics. Drape a chunky knit blanket over the couch and add a few accent pillows in colors like burnt orange, mustard yellow, and deep reds.
Tablescape Ideas: Dress up your dining table with a fall-inspired centerpiece. Think natural elements like pinecones, mini pumpkins, dried flowers, and candles in warm hues. Add a seasonal table runner to tie everything together.
With a few simple touches, your home can feel perfectly cozy and festive all season long! Check out our Pinterest board for more autumn inspo!
As Thanksgiving approaches, it’s time to start planning the menu. Here are a few ideas to help you create a delicious spread that celebrates the flavors of the season:
Classic Stuffing with a Twist: Add a handful of dried cranberries and toasted pecans to your traditional stuffing recipe for a pop of color and flavor. Sage and rosemary bring the taste of fall, while the cranberries add a hint of sweetness.
Maple Roasted Vegetables: Elevate your veggie game with a drizzle of maple syrup. Try a mix of carrots, sweet potatoes, and Brussels sprouts, roasted until caramelized. The maple syrup enhances the natural sweetness, while a sprinkle of sea salt and thyme adds depth.
Pumpkin Cheesecake Bars: For a dessert with a twist, swap out the classic pumpkin pie for pumpkin cheesecake bars. Creamy pumpkin cheesecake on a spiced graham cracker crust is an indulgent treat that’s easy to serve at family gatherings.
Check out our Pinterest boards for more Thanksgiving inspiration, from main dishes to sides and desserts that’ll make this holiday unforgettable!
With fall underway, now’s the time to prepare your home for colder temperatures. Here are a few tips to keep your home cozy and running efficiently throughout the season:
Seal Doors and Windows: Drafts can let chilly air sneak in and increase heating costs. Check your doors and windows for any gaps and apply weather-stripping where needed to keep your home insulated.
Furnace and HVAC Maintenance: Before temperatures drop, schedule a check-up for your furnace or HVAC system. Changing the air filter will help it run more efficiently, saving on energy costs, and ensuring your system is ready for colder weather.
Outdoor Prep: As the weather cools, it’s also a good time to store away patio furniture, trim back any plants that need pruning, and clean out the gutters. Be sure to cover water spigots in below freezing temperatures. These small tasks prevent potential problems as we head into the colder months.
Taking care of these seasonal tasks early on will ensure that your home stays warm, energy-efficient, and ready for the chilly days ahead.
Fall is a wonderful time to make your home a warm, inviting space filled with seasonal charm and cozy comfort. With a few decorative touches, some delicious recipes, and a little home maintenance, you’re all set to enjoy everything this season has to offer!
As the air turns crisp and fall settles in, the Oklahoma City metro area comes alive with a variety of events and activities to enjoy. Whether you're in the mood for outdoor markets, spooky Halloween fun, or getting a head start on holiday shopping, there’s something for everyone to experience in October and November. Here’s a guide to get ready for autumn as well as the exciting events happening around OKC that you won’t want to miss.
As the temperature drops and leaves begin to turn, now is the perfect time to embrace the spirit of fall and start preparing for the upcoming holiday season. Whether you're decorating your home with cozy touches, planning family gatherings, or thinking ahead to your Thanksgiving feast, there are so many ways to make the most of this season.
For inspiration, check out our Pinterest boards filled with ideas for everything from fall décor to Thanksgiving tablescapes and meal planning. You’ll find tips for creating a warm, welcoming atmosphere in your home, whether it’s through rich autumnal colors, pumpkin-themed decorations, or festive centerpieces.
Prepping for fall and Thanksgiving is all about creating a space where your family and friends can gather and enjoy time together. Use these Pinterest boards to spark ideas and make this season one to remember. Whether you're decking out your porch in fall foliage or planning the perfect Thanksgiving meal, you'll find plenty of creative ways to get festive. Happy decorating!
With such a variety of events and activities, the OKC metro area is buzzing with excitement throughout October and November. From farmers' markets and night shopping to festivals and sports, there’s something for everyone to enjoy. Be sure to check out one (or more) of these events and embrace the best that fall has to offer in Oklahoma City!
Every Saturday in October – Farmers Market at Scissortail Park
From 9 AM to 1 PM every Saturday in October, Scissortail Park also hosts a weekly Farmers Market. It’s an ideal stop for fresh produce, baked goods, handmade crafts, and more. Supporting local farmers and vendors has never been easier—or tastier!
October 18-20 – An Affair of the Heart / OKC Fairgrounds
One of the most anticipated shopping events of the season, An Affair of the Heart at the OKC Fairgrounds is a must-visit for anyone who loves unique, handmade goods. You’ll find an array of vendors offering home décor, jewelry, clothing, and much more. Whether you're shopping for yourself or getting a jump on holiday gifts, this event has it all.
October 19 – Heard on Hurd / Downtown Edmond
Head to Downtown Edmond for Heard on Hurd, a family-friendly street festival featuring local food trucks, live music, and pop-up shops. From 6 PM to 10 PM, this community event offers a lively atmosphere to explore local culture and enjoy delicious eats.
October 27 – Start of OKC Thunder Basketball Season
Thunder up! Basketball season is back, and the Oklahoma City Thunder will kick off their home opener on October 27. Catch the excitement at the Paycom Center and join the crowd as they cheer on the Thunder to another action-packed season.
October 28 – Brick-or-Treat / Free Trick-or-Treating in Bricktown
Looking for some spooky fun? Brick-or-Treat offers free trick-or-treating throughout Bricktown for kids of all ages. This family-friendly event is a great way to enjoy Halloween festivities while exploring the vibrant Bricktown district.
Throughout October, Orr Family Farm in Moore is packed with fall-themed fun for the whole family. With a pumpkin patch, corn maze, hayrides, and a petting zoo, it’s the perfect spot to celebrate the season. Don’t miss out on their special events, like spooky hayrides, as Halloween approaches.
Frontier City’s annual Fright Fest runs through the end of October and offers thrills and chills for visitors of all ages. With haunted houses, scare zones, and spooky shows, it's an ideal destination for those who love Halloween adventures. Be prepared for a spooky good time at one of Oklahoma’s favorite amusement parks.
November 8 – Night Market at Scissortail Park
If you missed the October edition, don’t worry—Night Market returns on November 8. Once again, you can explore local vendors offering handcrafted goods, artwork, and delicious food, all while enjoying the park’s festive atmosphere.
November 15-17 – Mistletoe Market / OKC Convention Center Downtown
Get in the holiday spirit early with the Mistletoe Market at the OKC Convention Center. This annual event is the perfect place to start (or finish) your holiday shopping. With tons of vendors offering gifts, home décor, clothing, and more, you’ll find something for everyone on your list.
November 22-23 – Santa Market / OKC Fairgrounds
Santa Market is another great opportunity to shop for unique holiday gifts while supporting local vendors. Located at the OKC Fairgrounds, this event features a wide selection of products, from festive decorations to handmade jewelry. Proceeds from the event go to a great cause, benefiting the Alzheimer’s Association.
Whether you're exploring a fall festival or getting a jump on holiday shopping, these events capture the spirit of the season. And if you're looking for a place to call home while enjoying everything the OKC metro has to offer, stop by one of our beautifully designed neighborhoods to learn more about our move-in-ready homes and custom home-building opportunities.
As the leaves begin to change and the crisp autumn air sets in, it's time for one of the most anticipated events of the season: the Fall Parade of Homes. Whether you're dreaming of building your own custom home, looking for design inspiration, or simply enjoy touring stunning properties, the Fall Parade of Homes is an event you won't want to miss. Join us as we take a closer look at what this year's parade has to offer and why it continues to be a must-see for homeowners and enthusiasts alike.
Stop by one or all of our Parade of Homes and experience the magic of Landmark Fine Homes firsthand. Tour our pre-designed homes available for purchase, explore our innovative designs, and envision yourself living the life you've always imagined.
September 27-29 and October 4-6
Homes will be open from 12:00-6:00 p.m.
We can't wait to see you! Learn more about our homes featured in the parade below.
Can't make it to the Parade? No problem. Our expert team is ready to assist you in finding your dream home at your convenience. Schedule a private viewing, browse our online gallery, or reach out to us directly to discuss custom home-building options tailored to your unique vision.
Whether you're seeking modern elegance, timeless charm, or something in between, Landmark Fine Homes is dedicated to helping you find the perfect place to call home. Your dream home awaits – let's find it together.
Fall in the Oklahoma City metro area is a season filled with vibrant colors, cooler temperatures, and plenty of fun activities for everyone. Whether you're a local or visiting for the first time, there are countless ways to enjoy the crisp autumn air and take in the sights and sounds of fall. From outdoor adventures to family-friendly festivals, here’s a guide to some of the best activities to explore this fall.
Fall is the perfect time to visit the Oklahoma City Zoo & Botanical Garden. The cooler weather makes it more comfortable to stroll through the expansive grounds, and many of the animals are more active during this season. Be sure to check out the zoo’s special fall events, such as "Zoo Brew" or “Haunt the Zoo,” which offers a fun and spooky experience for kids and families. Don’t forget to explore the botanical garden to see the beautiful autumn foliage and seasonal blooms.
Located in downtown OKC, the Myriad Botanical Gardens is a must-visit destination this fall. The gardens feature a stunning array of plants and trees that change colors with the season, creating a breathtaking backdrop for a leisurely walk. You can also enjoy various fall-themed events, including "Pumpkinville," outdoor yoga, and educational workshops. The children’s garden and playground offer a fun space for the little ones to explore, while the gardens’ cafes provide a cozy spot to enjoy a warm drink.
The Oklahoma State Fair is an annual tradition that brings fun, food, and entertainment to the OKC metro area. Held September 12-22, the fair offers a variety of activities, including carnival rides, live music, livestock shows, and more. Be sure to indulge in some classic fair food, from corn dogs and funnel cakes to more adventurous options like deep-fried Oreos. The fair also features shopping opportunities with local vendors and artisans, making it a great place to pick up unique fall decorations and gifts.
Orr Family Farm in Moore, OK, is a fantastic spot for family-friendly fall fun. The farm features a wide range of activities at their annual Fall Festival, including a pumpkin patch, corn maze, hayrides, and animal barn. Kids can enjoy train rides, pony rides, and a giant jumping pillow, and don't forget to finish the day with a famous Orr Family Farm cookie. Orr Family Farm is an ideal destination for creating cherished fall memories with your loved ones.
For those who love the great outdoors, a scenic drive through the Wichita Mountains Wildlife Refuge is a must this fall. Located just a short drive from the OKC metro, the refuge is home to stunning landscapes, diverse wildlife, and beautiful fall foliage. Pack a picnic and enjoy a meal surrounded by nature, or hike one of the many trails to take in panoramic views of the changing leaves. The cooler temperatures make it a great time to explore the natural beauty of Oklahoma.
The OKC metro area is bustling with fall festivals and events that offer fun for all ages. Some local favorites include the Plaza District Festival, a celebration of local arts and culture, and the Czech Festival, a Yukon tradition. Enjoy the changing of the weather by experiencing the the new southernmost section of Scissortail Park which will open to the public on September 23.
Fall is harvest season, and there's no better place to experience the bounty of local produce than at one of the OKC metro’s farmers markets. The Edmond Farmers Market, Scissortail Park Farmers Market, and Norman Farm Market are just a few of the many options to explore. Enjoy fresh fall produce, artisan goods, and local crafts while supporting the community’s farmers and small businesses.
The Wheeler District is a trendy, up-and-coming area in OKC that offers a unique blend of community, recreation, and entertainment. Take a stroll along the district’s scenic walking paths, explore local shops, or relax in one of the inviting green spaces. Don’t miss a ride on the Wheeler Ferris Wheel, where you can enjoy stunning views of the OKC skyline and the beautiful fall landscape. The district also hosts regular events and markets, making it a lively spot to visit this season.
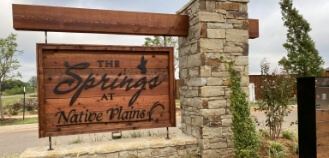
If you’re looking to enjoy the outdoors close to home, Landmark Fine Homes offers several communities throughout the OKC metro area with fantastic amenities. Our Springs communities in Norman, OKC, Edmond, Deer Creek, and Yukon feature walking trails and a community clubhouse with a fitness center and pool, perfect for a leisurely fall stroll or a refreshing dip before the weather gets too chilly. Our new Pine Creek community also offers outdoor fun with walking trails, a pool, playground, and ponds. Living in a Landmark Fine Homes community means you’re never far from nature and outdoor activities to enjoy the best of fall.
The OKC metro area offers a wealth of activities to help you make the most of the fall season. From exploring scenic drives and local parks to participating in community events and festivals, there’s something for everyone to enjoy. Whether you’re looking for family-friendly fun or a peaceful escape into nature, Oklahoma City and its surrounding areas have it all. And if you’re looking to settle down in a community that values outdoor living and access to amenities, consider Landmark Fine Homes for your next home. Embrace the beauty of fall and all the adventures that await you!
Landmark Fine Homes relies on the partnerships of realtors to help sell our homes. That is why we offer up to 3% commission on all sales and have put in place additional realtor programs to show our appreciation and benefit you.
All offers will be considered with buyers' agent compensation.
Many relocation companies charge realtors up to 40% of their initial commission, shying realtors away from these sales. Landmark Fine Homes will pay 1% of the home price back to the realtor/broker up to $3,000.
We understand building a home can take time. Landmark Fine Homes will pay half of the total commission at the time of groundbreaking and the remaining half at closing.
We would love to host your next office meeting at one of our model homes and cater breakfast or lunch for you and your team. Email us at kwilhelm@landmarkfinehomes.com to schedule!
As the summer days begin to wane, the back-to-school season is just around the corner. For parents, students, and teachers alike, this time of year marks a fresh start, brimming with the promise of new experiences and opportunities for growth. But with all the excitement, it’s easy to get overwhelmed by the hustle and bustle of preparing for the academic year ahead. Whether you’re getting the house ready, planning after-school snacks, or tackling that ever-growing school supply list, we’ve got you covered with some practical tips and inspiration to make this transition smooth and enjoyable.
Creating a Functional Mud Bench/Drop Zone
One of the key elements to staying organized during the school year is having a designated space where kids can drop off their bags, shoes, and other essentials as soon as they walk in the door. Enter the mud bench or drop zone—your home’s command center for keeping the chaos at bay.
Mud Bench Essentials:
Drop Zone Inspiration:
If you’re looking to spruce up your mud bench or drop zone, here are a few ideas:
After-School Snack Ideas
With busy school schedules and extracurricular activities, it’s important to have a variety of healthy, delicious snacks on hand to keep your kids energized and satisfied. Here are some easy and fun after-school snack ideas that are sure to be a hit:
Quick and Healthy Snacks:
Fun and Creative Snacks:
Check out our Pinterest page for more mud bench inspo and after-school snack ideas!
Your Ultimate School Supply Shopping Guide
School supply shopping can be both exciting and overwhelming, especially with the long lists of items required for each grade. Here’s a guide to help you navigate the aisles and ensure you have everything your child needs for a successful school year.
Start with the Basics:
Organization Essentials:
Tech Tools:
Extras and Nice-to-Haves:
Shop Early and Smart:
Bringing It All Together
As the school year approaches, staying organized and prepared is key to ensuring a smooth transition for the whole family. By setting up a functional mud bench or drop zone, preparing healthy after-school snacks, and tackling your school supply shopping with confidence, you’ll be well on your way to a successful start.
At Landmark Fine Homes, we understand the importance of creating a home that supports your family’s needs, especially during busy seasons like back-to-school. Our communities are designed with family-friendly amenities and thoughtful spaces that make it easy to stay organized and enjoy the little moments. From built-in storage solutions to community amenities like walking trails and playgrounds, our homes are crafted with your family in mind. As you prepare for the new school year, let us help you create a home where you can thrive and make lasting memories together.
Building a custom home is one of the most significant and exciting investments you'll make in your lifetime. At Landmark Fine Homes, we are dedicated to turning your dream home into a reality. If you love one our existing floorplans but have unique preferences or adjustments you’d like to make, we are here to bring your vision to life. Let's delve into what makes our custom home-building process exceptional.
At Landmark Fine Homes, we believe that your home should reflect your personality, lifestyle, and needs.
Our Design Studio is where the magic happens. It's here that your vision starts to take tangible form.
With Landmark Fine Homes, you're not just building a house; you're creating a home with the help of experts who care about your satisfaction.
Our ultimate goal is to ensure that you are thrilled with your new home.
At Landmark Fine Homes, we understand the importance of community and creating spaces where families can thrive.
Building a custom home with Landmark Fine Homes is an exciting journey that results in a home tailored to your unique needs and tastes. Our commitment to customization, personalization, and quality ensures that your home will be everything you dreamed of and more. If you're ready to embark on this journey, contact us today to start building the home of your dreams. At Landmark Fine Homes, your vision is our mission.
The Oklahoma City Metro Area is a vibrant and diverse region that offers plenty of outdoor activities for residents and visitors. From bustling urban parks to serene natural landscapes, there are countless opportunities to enjoy the great outdoors in Oklahoma City, Norman, Edmond and Moore.
Oklahoma City
Norman
Edmond
Moore
At Landmark Fine Homes, we understand the importance of outdoor amenities in fostering a vibrant and active lifestyle. Our Springs communities located in Norman, OKC, Edmond, and Yukon are designed with lifestyle in mind. Each of these communities features walking trails and pools, providing residents with the perfect environment to stay active and enjoy the outdoors.
Our new Pine Creek community is also complete with plenty of outdoor activities. This neighborhood offers walking trails, a pool, a playground, and ponds where residents can enjoy catch-and-release fishing. This community is designed to provide a holistic living experience that combines the beauty of nature with modern conveniences.
The Oklahoma City Metro Area is rich with opportunities for outdoor activities, from urban parks and lakes to serene trails and recreational areas. Whether you’re exploring the bustling cityscape of OKC, the natural beauty of Norman, or the family-friendly parks of Edmond and Moore, there’s something for everyone to enjoy.
At Landmark Fine Homes, we take pride in creating communities that not only offer beautiful homes but also provide exceptional outdoor amenities to enhance your lifestyle. If you’re looking to embrace outdoor living, we invite you to explore our Springs communities and the new Pine Creek community. Discover the perfect place to call home, where you can thrive and enjoy the great outdoors every day.
As spring unfolds and the risk of severe weather looms, it's crucial for every Oklahoman to prioritize storm safety and be prepared for the unexpected. We've put together a list of tornado preparedness strategies, essential safety tips, and how to assemble a storm safety kit so you and your loved ones can best be prepared this season.
Tornado Safety Tips:
Storm Safety Kit:
In addition to having a plan and knowing what to do during a tornado, it's essential to have a well-stocked safety kit on hand. Here are some items to include in your kit:
As Oklahomans, we understand the importance of being prepared for severe weather, especially tornadoes. By staying informed, having a plan, and assembling a safety kit, you can protect yourself and your loved ones during these potentially life-threatening events.
If you are looking for a move-in ready home that can come with an in-ground or above-ground storm shelter at no additional cost to you, check out our beautiful pre-designed homes available now! This offer is only available for our move-in ready homes!
It's that time of year again – the eagerly anticipated Parade of Homes is back! This year, we are thrilled to present 7 exquisite homes featured in the Parade. As the spring season blooms with new possibilities, there's no better time to explore these stunning homes and envision the life you've always dreamed of. At Landmark Fine Homes, we understand the significance of finding the perfect home – a place where comfort, safety, and happiness combine to create an ideal living environment.
Stop by one or all of our Parade of Homes and experience the magic of Landmark Fine Homes firsthand. Tour our pre-designed homes available for purchase, explore our innovative designs, and envision yourself living the life you've always imagined.
April 19, 20 & 21 and April 26, 27 & 28 Homes will be open from 12:00-6:00 p.m.
Parade of Homes Incentives *On completed inventory, ask our New Home Consultants for details. April 19 – 30, 2024.*
Can't make it to the Parade? No problem. Our expert team is ready to assist you in finding your dream home at your convenience. Schedule a private viewing, browse our online gallery, or reach out to us directly to discuss custom home-building options tailored to your unique vision.
Whether you're seeking modern elegance, timeless charm, or something in between, Landmark Fine Homes is dedicated to helping you find the perfect place to call home. Your dream home awaits – let's find it together.