Contact Our Team
(405) 292-5263
Find Your Home
Find Your Home
Quick Move-In Homes
Model Homes
Build on Your Lot
Cities
Cities
▾
Norman, OK
Oklahoma City, OK
Edmond, OK
Yukon, OK
Tuttle, OK
Piedmont, OK
Arcadia, OK
Goldsby, OK
Mustang, OK
Washington, OK
Communities
Cypress Plains
Manning Estates
Pine Creek
Dow's Hills
Prairie Estates
The Grand
The Vineyard
The Preserve at Parkside
Carrington Lakes
Active Adult Communities
The Springs at Cypress Plains
The Springs at Flint Hills
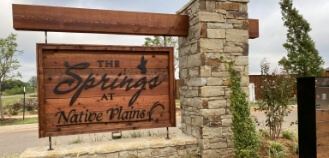
The Springs at Native Plains
The Springs at Valencia
The Springs at Skyline Trails
Floor Plans
The Landmark Difference
Our Process
Design Studio
Community Impact
Energy Efficiency
About Us
About Us
Blog
Gallery
Contact Our Team
(405) 292-5263
Contact Us
Find Your Home
Floor Plans
The Landmark Difference
Our Process
Design Studio
Community Impact
Energy Efficiency
About Us
About Us
Blog
Gallery
Back
Find Your Home
Quick Move-In Homes
Model Homes
Build on Your Lot
Cities
Norman, OK
Oklahoma City, OK
Edmond, OK
Yukon, OK
Tuttle, OK
Piedmont, OK
Arcadia, OK
Goldsby, OK
Mustang, OK
Washington, OK
Communites
Cypress Plains
Manning Estates
Pine Creek
Dow's Hills
Prairie Estates
The Grand
The Vineyard
The Preserve at Parkside
Carrington Lakes
Active Adult Communities
The Springs at Cypress Plains
The Springs at Flint Hills
The Springs at Native Plains
The Springs at Valencia
The Springs at Skyline Trails
Search for:
search
angle-left
angle-right
cross
menu